
To begin with, we need to develop some of the basic building blocks for use in our processor. One of the largest functions of our processor will be math, so let's start with the half adder. If you recall from earlier, we have already developed the schematic for one. Let's take this schematic:
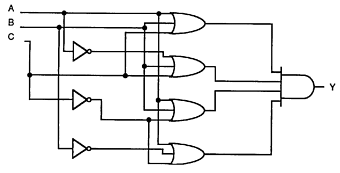
and put it into a more simplistic form by just making a box labled HA. If we didn't do this, by the time our processor shematic was complete, you wouldn't be able to follow it! So let's take a look at how that looks now:

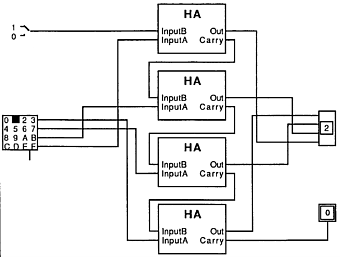
Looks great! Now a half adder won't do a whole lot for us if we stop here. So let's use that half adder to build the next large step, a 4-bit incrementer. An 4 bit incrementer has 4 input lines (hence the 4 bit), and one increment flag. If the increment flag is set to one, it output the input+1, if the flag is 0, it just outputs the input. The ouput is just 4 output lines, and a carry line. We will use 4 half adders to do this. Now is also a good time to introduce the Hex keyboard, and display. These will just be used to show how things work in the schematics. If you recall, hex is very useful, since it is base 16 it allows us to represent any 4-bit binary combination with only 1 character. Thus a 4 bit binary output can be viewed as a single hex character (ie. 0010b=2h). Although these displays make it look very clean, remember under the surface it is all just 0's and 1's. Well, let's look at that schematic!
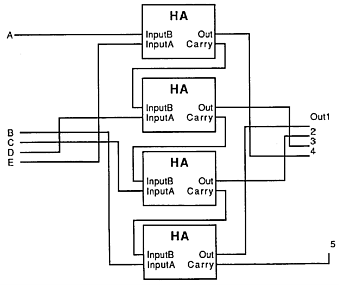
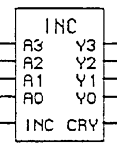
That's it! Now, let's connect that to those hex displays and keypads we were talking about, and view the output. The letter darkened by the hex keypad represents the key that is pressed:
As you can see, our 4-bit incrementer works! This is the first 4-bit component we've built. But what good is it you ask? Great question... This device will be used to generate our two's compliment numbers! Lets take a look using binary switches, and probes:
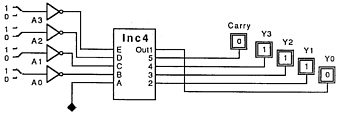
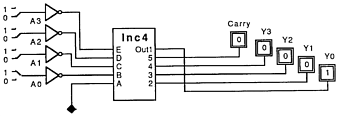
Alright, we now have a very important, and necessary part of our microprocessor.
Let's keep right on going building these basic devices. Remember, if you get stuck, go back to some of the early sections and read up. If that still doesn't help, you can always e-mail me at team-0@gamezero.com... So onto the Full Adder. Instead of just designing a basic full adder, let's make it 4-bit full adder, so it'll be useful. Let's start with the shematic for a 1-bit full adder (you remember this in a slightly different form from earlier, right?):
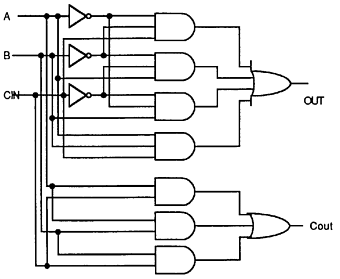
Now we will take this 1-bit full adder, and place it into a box as a building block for bigger circuits:
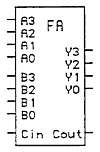
We now want to make that 1-bit full adder into a 4-bit full adder. Remember that a 4-bit adder should be able to add two 4-bit numbers and a carry, to get one 4-bit answer, and a single carry out. If you think about it, it is very easy, The output from a 1-bit adder is simply one output line, and a carry line. The input is 2 bits, plus a carry in. To design a 4-bit adder, we will take the carry out from one adder, and bring it into the carry in to the next. Each 1bit adder will then have 2 input lines, and the device will have 1 carry in for all the adders. Before you look at the schematic, think about this one. You should be able to come up with this on your own without that much of a problem using our current building blocks. Let's look at it now:
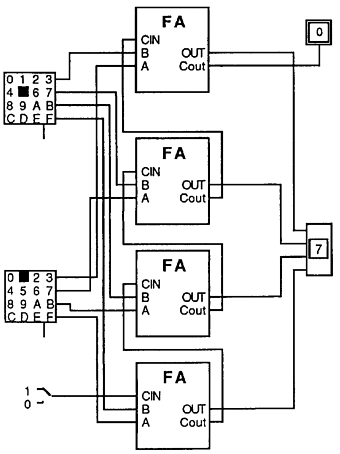
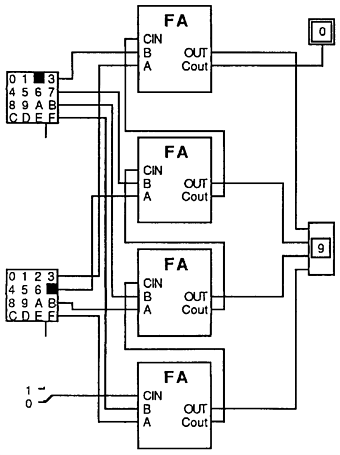
Now that's not too tough, is it? We have designed all of the very basic mathematical functions for our processor. Technically speaking, these are enough functions to constitute a very rude foundation for an ALU. However, to make our processor better than just an adding machine, we will continue to add more devices. Why don't you take a break, read through this well, and then join me for the next section where we design Multiplexors, which will control the flow of data through our system.
Jump Back to the Processor Design Home Page